
If you have a project where you want to integrate a chat, then, Twilio is a great tool to choose. For developers, creating a chat from scratch for the first time can become a pain. Creating only an API for the chat on your own will be a very complex task. There is a lot of stuff in chat functionality you will have to take care of: endpoints for sending a message, creating chat channels for two people, or group channels, loading messages (with pagination), API for counting unread messages, marking a message as “read”, block/unblock users and so on. Also, you may want to be able to send media files in your chat, and you will have to build an API for that too.
Twilio provides an API for working with all of that and lets you focus on making a frontend part of your chat. Here is an example setup for redux and react Twilio chat.
There is a tutorial of implementing a chat with react on Twilio blog, however, it is built only with react, and all of the logic is inside the components, so it will become hard to extend the chat with new functionality.
With Redux, we can separate working with chat data from the components to Redux store files. And our components will be responsible only for displaying the data from the store.
Here is our solution for the chat with react and redux. As a starting point, we assume that you already have set up an API for Twilio. Here we focus on the frontend part of Twilio based chat.
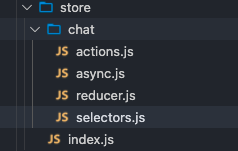
Step 1. Creating files for Redux store
First is the chat store files, actions, asynchronous requests, reducer, and selectors
The initial chat state will look like this.
Step 2. Initial chat state
reducer.js:
 loading: false,
 loaded: false,
 channels: {},
 messages: {
   // [channelSid]: messages
 },
 form: {
   // [channelSid]: value
 },
 selectedChannelSid: '',
 error: null
}
Here we store channels as an object we load from Twilio, messages is a map object with a channelSid as a key, and Twilio messages object as a value. A form is also a map object with channelSid key and input value - value. Here each channel may have a different input state, so users can switch between channels, and the input value for each channel will be stored. And selectedChannelSid will change when the user clicks on different channels. Loading and loaded flags tell us if chat is initialized, or is being initialized, so we can show loading indicators, and prevent us from accidently initializing the chat multiple times.
The reason I store the message input values in a redux store, instead of the component state, is because chat may live on a separate page, and won’t always be rendered so that when component destroys, the redux store leaves the same, and user may return to the chat page and see the inputs with the values, he left there.
Step 3. Adding actions for our state
Next, we will need actions for initializing chat, loading messages, selecting a channel, changing the input state, and adding the message.
In actions.js:
const HOAC = type => payload => ({ type, payload })

export const actionTypes = {
 INIT_CHAT: `${REDUCER}INIT_CHAT`,
 INIT_CHAT_SUCCESS: `${REDUCER}INIT_CHAT_SUCCESS`,
 INIT_CHAT_ERROR: `${REDUCER}INIT_CHAT_ERROR`,
 LOAD_MESSAGES: `${REDUCER}LOAD_MESSAGES`,
 SELECT_CHANNEL: `${REDUCER}SELECT_CHANNEL`,
 ADD_MESSAGE: `${REDUCER}ADD_MESSAGE`,
 INPUT: `${REDUCER}INPUT`
}

export const actions = {
 initChat: HOAC(actionTypes.INIT_CHAT),
 initChatSuccess: HOAC(actionTypes.INIT_CHAT_SUCCESS),
 initChatError: HOAC(actionTypes.INIT_CHAT_ERROR),
 loadMessages: HOAC(actionTypes.LOAD_MESSAGES),
 selectChannel: HOAC(actionTypes.SELECT_CHANNEL),
 addMessage: HOAC(actionTypes.ADD_MESSAGE),
 input: HOAC(actionTypes.INPUT)
}
Step 4. Adding reducer function
The Reducer function:
In reducer.js
 switch (type) {
 case actionTypes.INIT_CHAT:
   return {
     ...state,
     loading: true
   }
 case actionTypes.INIT_CHAT_SUCCESS: {
   return {
     ...state,
     ...payload,
     loading: false,
     loaded: true
   }
 }
 case actionTypes.INIT_CHAT_ERROR:
   return {
     ...state,
     loading: false,
     loaded: false,
     error: payload
   }
 case actionTypes.LOAD_MESSAGES:
   return {
     ...state,
     messages: payload
   }
 case actionTypes.SELECT_CHANNEL: {
   return {
     ...state,
     selectedChannelSid: payload
   }
 }
 case actionTypes.ADD_MESSAGE: {
   const channelSid = payload.channel.sid
   const channelMessages = state.messages[channelSid]?.items || []

   return {
     ...state,
     messages: {
       ...state.messages,
       [channelSid]: {
         ...channelMessages,
         items: [...channelMessages, payload]
       }
     }
   }
 }
 case actionTypes.INPUT: {
   const { value, channelSid } = payload

   return {
     ...state,
     form: {
       ...state.form,
       [channelSid]: value
     }
   }
 }
 default:
   return state
 }
}

export default chatReducer
Such a format for storing data is easy to understand and work with. However in order to take the data we want in a component (f.e. Messages for currently selected channel), we will need some data selecting logic, and this can be repeated after the chat is split into different components.
Step 5. Creating state data selectors
We can create a selectors file with functions, which extracts the data in needed format for our components.
In store/chat/selectors.js
const getChannels = state => state.chat.channels
const getLoaded = state => state.chat.loaded
const getForm = state => state.chat.form
const getMessages = state => state.chat.messages

const getSelectedChannel = createSelector(
 getSelectedChannelSid,
 getChannels,
 getLoaded,
 (selectedChannelSid, channels, loaded) => {
   if (!loaded)
     return null

   return channels.items.find(c => c.sid === selectedChannelSid)
 }
)

const getSelectedChannelMessages = createSelector(
 getSelectedChannelSid,
 getMessages,
 getLoaded,
 (selectedChannelSid, messages, loaded) => {
   if (!loaded)
     return null

   return messages[selectedChannelSid]
 }
)

const getSelectedChannelInput = createSelector(
 getSelectedChannelSid,
 getForm,
 (selectedChannelSid, form) => form[selectedChannelSid] || ''
)

export { getSelectedChannel, getSelectedChannelMessages, getSelectedChannelInput }
Step 6. Async functions
The next step is to create async functions to initialize chat, load channels, messages, and send a message.
In async.js
import { actions } from './actions'
import store from '../index'

const dispatch = store.dispatch

async function initChat() {
 dispatch(actions.initChat())

 try {
   // loading a token from server, this depends on your api
   const response = await fetch(/* token api url */)
   const { token } = await response.json()
   const chat = new TwilioChat(token)
   await chat.initialize()
   const channels = await chat.getSubscribedChannels()
   await loadMessages(channels)
   setEventListeners(chat, channels)

   dispatch(actions.initChatSuccess({ channels }))
 } catch (e) {
   dispatch(actions.initChatError(e))
 }
}

async function loadChannelMessages(channelSid, channels) {
 const messages = await channels.items.find(c => c.sid === channelSid).getMessages()
 dispatch(actions.loadChannelMessages(messages))
}

async function loadMessages(channels) {
 const messagesArr = await Promise.all(
   channels.items.map(async channel => ({
     sid: channel.sid,
     messages: await channel.getMessages()
   }))
 )

 // creating a messages map object
 const messages = messagesArr.reduce((acc, current) => {
   acc[current.sid] = current.messages
   return acc
 }, {})

 dispatch(actions.loadMessages(messages))
}

function setEventListeners(chat) {
 chat.on('messageAdded', m => dispatch(actions.addMessage(m)))
 chat.on('channelJoined', async channel => {
   dispatch(actions.addChannel(channel))
 })
}

function sendMessage(message, channel) {
 channel.sendMessage(message)
}

export {
 initChat,
 loadChannelMessages,
 sendMessage
}
Step 7. Creating UI components
And the UI part. Here we split the chat into 4 components: Chat, Channels, Messages and Form.
Chat.js:
import { initChat } from '../../store/chat/async'
import Messages from './Messages/Messages'
import Form from './Form/Form'
import Channels from './Channels/Channels'

const Chat = ({ loading, loaded, selectedChannelSid }) => {
 useEffect(() => {
   if (!loaded && !loading)
     initChat()
 }, [])

 if (loading || !loaded)
   return <p>loading</p>

 return <div className="chat-box">
   <Channels />
   {selectedChannelSid ?
     <div className="messages-box">
       <Messages />
       <Form />
     </div>
     : <p>Please select the channel</p>
   }
 </div>
}

export default connect(state => ({
 loading: state.chat.loading,
 loaded: state.chat.loaded,
 selectedChannelSid: state.chat.selectedChannelSid
}))(Chat)
Channels.js
import { actions } from '../../../store/chat/actions'

const Messages = ({ channels, onSelectChannel }) => {

 return (
   <ul className="chat-channel-list">
     {channels.items.map(c =>
       <li className="chat-channel" key={c.sid}>
         <button className="chat-channel-btn" onClick={() => onSelectChannel(c.sid)}>
           {c.friendlyName}
         </button>
       </li>
     )}
   </ul>
 )
}

export default connect(state => ({
 channels: state.chat.channels
}), dispatch => ({
 onSelectChannel: channelSid => dispatch(actions.selectChannel(channelSid))
}))(Messages)
Messages.js:
import { connect } from 'react-redux'
import { getSelectedChannelMessages } from '../../../store/chat/selectors'

const Messages = ({ messages }) => {
 return (
   <ul className="message-list">
     {messages.items.map(({ state }) =>
       <li className="message" key={state.sid}>
         {state.body}
       </li>)
     }
   </ul>
 )
}

export default connect(state => ({
 messages: getSelectedChannelMessages(state)
}))(Messages)
Form.js:
import { getSelectedChannelInput, getSelectedChannel } from '../../../store/chat/selectors'
import { sendMessage } from '../../../store/chat/async'
import { actions } from '../../../store/chat/actions'

const Form = ({ inputValue, onInput, selectedChannel }) => {
 const handleInput = useCallback(value => onInput({
   channelSid: selectedChannel.sid,
   value
 }), [selectedChannel.sid])

 const onSendMessage = e => {
   e.preventDefault()

   if (!inputValue) return

   sendMessage(inputValue.trim(), selectedChannel)
   handleInput('')
 }

 return (
   <form onSubmit={onSendMessage}>
     <input
       value={inputValue}
       onChange={e => handleInput(e.target.value)}
     />
     <button>send</button>
   </form>
 )
}

export default connect(state => ({
 inputValue: getSelectedChannelInput(state),
 selectedChannel: getSelectedChannel(state)
}), dispatch => ({
 onInput: payload => dispatch(actions.input(payload))
}))(Form)
Step 8. Adding styles
Let's add styles to App.css.
 padding: 0;
 margin: 0;
 box-sizing: border-box;
}

body {
 margin-top: 15px;
}

.chat-box {
 display: flex;
 justify-content: center;
}

.chat-channel-list {
 padding-left: 15px;
 width: 300px;
 list-style: none;
 display: flex;
 flex-direction: column;
 align-items: stretch;
}

.chat-channel {
 margin-top: 8px;
 padding: 4px;
 border-radius: 3px;
 border: 1px solid #000;
}

.chat-channel-btn {
 border: none;
 font-size: 17px;
 width: 100%;
 height: 100%;
 display: block;
 outline: none;
 cursor: pointer;
 background: transparent;
}

.messages-box {
 margin-left: 15px;
 display: flex;
 flex-direction: column;
}

.message-list {
 flex: 1;
 display: flex;
 flex-direction: column;
 align-items: flex-start;
 width: 200px;
 height: 50px;
 list-style: none;
}

.message {
 margin-top: 5px;
}
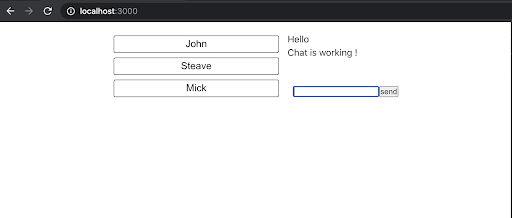
Testing
So the final result can look like this:
Conclusion
So what we did is created all the logic for working with the chat inside the redux store files, and now components are only responsible for defining the look of the chat. Also using redux, each component now takes the data it needs directly from the store, so no need for passing it as a props.